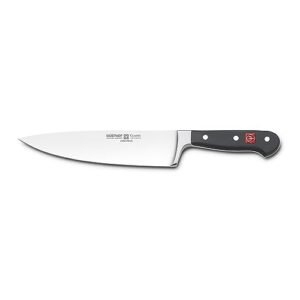
A sharp kitchen knife cuts food more cleanly, safely, and with less effort. A dull edge often slips, crushes ingredients, and makes preparation frustrating.
This guide explains how to sharpen kitchen knives at home using whetstones, manual sharpeners, electric sharpeners, and honing tools. You will also learn the correct angle, grit, technique, and maintenance routine for different kitchen knives.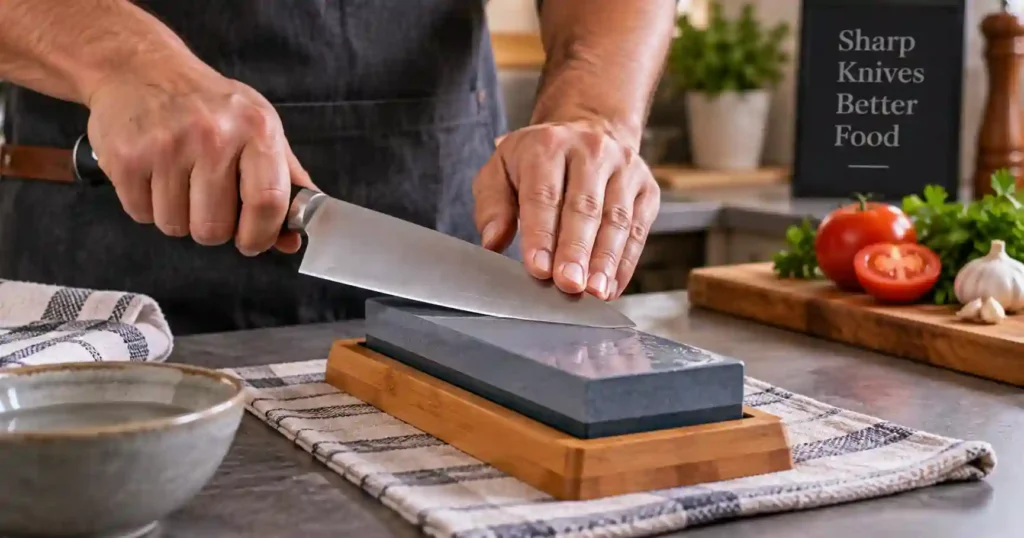
The Best Way to Sharpen Kitchen Knives
The best method depends on the knife, edge condition, and your sharpening experience. For maximum control, a whetstone is the most versatile home method, while a manual or electric sharpener is easier for beginners.
| Method | Best For | Skill Level | Edge Control |
|---|---|---|---|
| Whetstone | Precise sharpening and regular maintenance | Intermediate | Excellent |
| Manual sharpener | Quick home sharpening | Beginner | Good |
| Electric sharpener | Fast, repeatable sharpening | Beginner | Good |
| Honing rod | Maintaining an existing edge | Beginner | Good |
| Professional sharpening | Chips, major damage, and specialty knives | Any | Excellent |
For most home cooks, a whetstone offers the greatest control over the edge. However, a preset-angle sharpener can be more practical when speed and simplicity matter most.
For guidance on knife construction and care, see our guide to the best kitchen knives for home cooks.
Sharpening vs. Honing: What Is the Difference?
Sharpening removes a small amount of metal to create a new cutting edge, while honing primarily realigns an existing edge.
| Sharpening | Honing |
|---|---|
| Restores a dull cutting edge | Helps realign the existing edge |
| Removes some metal | Usually removes little or no significant metal |
| Needed less often | Can be performed more frequently |
| Uses stones or sharpeners | Often uses a honing rod |
Regular honing can help maintain cutting performance between sharpening sessions. Victorinox also distinguishes honing from sharpening and recommends sharpening less frequently than honing.
A honing rod cannot fully restore a severely dull or damaged edge. Once the blade no longer responds to honing, proper sharpening is needed.
What Angle Should You Use?
Most kitchen knives use roughly 15 to 20 degrees per side, but the correct angle depends on the knife’s design and manufacturer.
| Knife Type | Typical Range Per Side | General Consideration |
|---|---|---|
| Western-style chef knife | About 17–25° | Higher angles generally favor durability |
| Thin Japanese kitchen knife | About 12–17° | Lower angles can support fine slicing |
| Santoku | Often around 10–15° | Follow the manufacturer’s specification |
| General kitchen knife | About 15–20° | A practical starting range |
Work Sharp notes that there is no single ideal angle for every kitchen knife. Its guidance places many Western knives around 17–25 degrees and Eastern-style knives around 12–17 degrees.
WÜSTHOF and ZWILLING also use different angles across their knife ranges. Therefore, the manufacturer’s recommendation should take priority when available.
A lower angle can produce a fine cutting edge, but the edge may be less durable. A higher angle generally creates a stronger edge that can better tolerate demanding use.
How to Sharpen a Kitchen Knife With a Whetstone
Sharpening with a whetstone requires a consistent angle, controlled pressure, and enough strokes to form a burr along the edge.
1. Choose the Right Stone
Choose the grit according to how dull or damaged the knife is. A medium stone around 800–1,200 grit works well for many routine sharpening jobs.
| Grit | Typical Use |
|---|---|
| Coarse | Repairing very dull or damaged edges |
| Medium | Routine sharpening and establishing an edge |
| Fine | Refining and polishing an established edge |
Do not assume that a very fine stone is always better. Fine stones are designed to refine an edge, while coarse stones remove material faster.
For example, SHARPAL’s whetstone guidance uses 1,000 grit for establishing a new edge and 6,000 grit for finishing and polishing.
2. Prepare the Whetstone
Prepare the stone according to the manufacturer’s instructions before sharpening. Water stones may require soaking, while some modern stones are designed for different lubrication methods.
WÜSTHOF recommends soaking certain whetstones before use and placing the stone on a stable, nonslip surface.
3. Position the Knife
Place the knife against the stone at the intended sharpening angle. Keep the angle consistent throughout every stroke.
A small angle guide can help beginners maintain consistency. However, relying on technique becomes easier with practice.
4. Sharpen From Heel to Tip
Move the blade across the stone in a controlled motion from the heel toward the tip. Cover the entire cutting edge during each sequence.
Use light, controlled pressure instead of forcing the blade into the stone. Excessive pressure can make the motion inconsistent and remove unnecessary metal.
5. Create a Burr
Continue sharpening until you can feel a small burr along the opposite side of the edge.
The burr indicates that the abrasive has reached the edge. Check carefully with your fingertip by feeling across the edge, not along it.
6. Repeat on the Other Side
Turn the knife over and repeat the same process on the opposite bevel. Try to use a similar number of strokes on both sides.
ZWILLING recommends developing a burr before switching sides and using controlled repetitions during stone sharpening.
7. Refine the Edge
Move to a finer grit when the edge has been established and the burr is consistent. Use lighter pressure during the finishing stage.
Finish by removing the remaining burr with a few controlled alternating strokes. A leather strop can provide additional refinement when appropriate.
8. Test the Knife
Test the finished edge with a sheet of paper or a soft food such as a tomato. A sharp edge should cut cleanly without excessive force.
Avoid testing sharpness by dragging a finger across the blade. That method can cause an unnecessary cut.
How to Sharpen a Dull Kitchen Knife
A very dull knife usually needs a coarse or medium abrasive before a fine finishing stone can restore the edge.
- Inspect the edge for chips, bends, or other damage.
- Choose a grit appropriate for the condition.
- Set the correct angle for the knife.
- Sharpen one side until a burr forms.
- Repeat the process on the opposite side.
- Move to a finer grit if the edge needs refinement.
- Remove the remaining burr.
- Test the cutting performance safely.
Do not start with an extremely coarse stone unless the edge actually requires substantial material removal. Excessive grinding shortens the useful life of the blade.
How to Use a Manual Knife Sharpener
A manual pull-through sharpener is one of the simplest options because the sharpening slots normally control the blade angle.
Step-by-Step Method
- Place the sharpener on a stable surface.
- Follow the manufacturer’s instructions for the sharpening slot.
- Place the heel of the blade into the slot.
- Pull the knife through smoothly toward the tip.
- Use the recommended number of passes.
- Use the finishing slot when the sharpener provides one.
- Clean the blade before returning it to storage.
Do not repeatedly pull the knife through the sharpener without checking the edge. Excessive passes can remove more metal than necessary.
Preset-angle sharpeners can be particularly useful for beginners who struggle to maintain a consistent angle manually.
How to Use an Electric Knife Sharpener
An electric sharpener provides fast, repeatable sharpening because the machine controls the abrasive and sharpening angle.
Use only a sharpener designed for the type of knife being sharpened. Follow the manufacturer’s instructions for the number of passes and sharpening stages.
Keep the knife moving smoothly through the guide. Avoid forcing the blade against the abrasive.
Electric sharpeners are convenient for busy kitchens, but they can remove more material than careful stone sharpening when used incorrectly.
How to Sharpen Kitchen Knives With a Honing Rod
A honing rod is primarily a maintenance tool that helps realign an edge between sharpening sessions.
Honing Technique
- Hold the rod securely with the tip supported or positioned safely.
- Place the knife against the rod at the recommended angle.
- Start near the heel of the blade.
- Move the knife toward the tip in a controlled motion.
- Repeat on the opposite side.
- Use light pressure and consistent movements.
Victorinox demonstrates honing at approximately 20 degrees to the steel, while other manufacturers specify different angles. Always follow the knife’s recommended geometry when possible.
A ceramic or diamond rod may be appropriate for some harder blades. The correct tool depends on the knife material and edge design.
How to Know When a Knife Needs Sharpening
A knife needs sharpening when honing no longer restores clean cutting performance.
Common warning signs include:
- The knife struggles to start a cut.
- Tomato skin tears instead of slicing cleanly.
- Food gets crushed instead of cut.
- The blade requires noticeably more pressure.
- The knife slips during common cutting tasks.
- Honing provides little improvement.
The paper test is another simple check. A properly sharpened straight edge should slice through paper without excessive snagging.
How Often Should Kitchen Knives Be Sharpened?
Most home cooks should sharpen according to knife performance rather than a rigid calendar.
Honing can be performed more frequently because it primarily maintains the existing edge. Actual sharpening should happen when the knife remains dull despite proper honing.
Victorinox notes that home cooks may sharpen roughly once or twice per year depending on use, while heavier users may need more frequent maintenance.
Sharpening too often can unnecessarily remove metal and gradually change the blade’s geometry.
What Causes Kitchen Knives to Become Dull?
Kitchen knives become dull because the thin cutting edge gradually deforms and wears during repeated use.
Several habits can accelerate that process:
- Cutting on glass or stone surfaces.
- Using the knife on hard frozen foods.
- Twisting the blade during difficult cuts.
- Scraping food with the cutting edge.
- Storing knives loosely in a drawer.
- Putting unsuitable knives in a dishwasher.
- Using excessive force during cutting.
A suitable cutting board can make a noticeable difference in everyday knife maintenance. For meat preparation, see our guide to the best cutting boards for raw meat.
How to Sharpen Different Types of Kitchen Knives
Different blade designs require different sharpening approaches, especially when the edge is serrated or single-beveled.
Chef’s Knife
A chef’s knife is usually straightforward to sharpen because it has a long, continuous cutting edge.
Use a whetstone, suitable manual sharpener, or electric sharpener according to the knife manufacturer’s specifications.
For more chef-knife buying guidance, see our article about the best knife for a home chef.
Santoku Knife
A Santoku often has a thinner edge and may use a lower sharpening angle than many Western-style knives.
Check the manufacturer’s specifications before selecting the angle. Avoid applying a generic angle that could change the intended edge geometry.
Paring Knife
A paring knife can be sharpened using the same basic principles as a chef’s knife, but its smaller blade requires shorter controlled movements.
Maintain the same angle from heel to tip. Avoid applying unnecessary pressure to the small cutting edge.
Serrated Knife
Serrated knives should not be sharpened like conventional straight-edge knives.
Each serration has its own cutting geometry, so a specialized sharpening tool or professional service is often more appropriate. ZWILLING specifically advises against using conventional honing steel on serrated knives.
Single-Bevel Knives
Single-bevel knives require a different sharpening technique because only one side contains the primary bevel.
Follow the manufacturer’s instructions rather than applying a standard double-bevel sharpening method. Japanese specialty knives are especially likely to require this approach.
How to Sharpen a Knife Without Damaging the Edge
Use the correct angle, light pressure, appropriate grit, and controlled strokes to minimize unnecessary metal removal.
- Do not change the sharpening angle repeatedly.
- Do not use excessive pressure.
- Do not start with an unnecessarily coarse abrasive.
- Do not make unlimited passes through a pull-through sharpener.
- Do not sharpen serrated edges with unsuitable equipment.
- Do not ignore chips or serious edge damage.
- Do not sharpen a knife simply because a calendar reminder says it is time.
Consistent technique matters more than aggressive grinding. A controlled sharpening session should restore the edge without unnecessarily changing the blade profile.
Common Knife Sharpening Mistakes
| Mistake | Why It Matters | Better Approach |
|---|---|---|
| Using one angle for every knife | Different knives have different edge geometries | Follow the manufacturer’s recommendation |
| Applying too much pressure | Can remove excessive material | Use controlled, moderate pressure |
| Using the finest grit immediately | Fine stones remove material slowly | Match grit to edge condition |
| Confusing honing with sharpening | Honing cannot fully restore a very dull edge | Sharpen when honing stops helping |
| Ignoring the burr | The edge may not be fully established | Check for a consistent burr |
| Sharpening serrated blades incorrectly | Can damage the serration geometry | Use specialized equipment |
| Sharpening too frequently | Unnecessary metal removal shortens blade life | Sharpen based on performance |
Whetstone vs. Knife Sharpener
A whetstone provides more control, while a manual or electric sharpener provides greater convenience.
| Feature | Whetstone | Manual Sharpener | Electric Sharpener |
|---|---|---|---|
| Ease of use | Requires practice | Easy | Very easy |
| Angle control | High | Preset | Preset |
| Versatility | High | Moderate | Moderate |
| Learning curve | Higher | Low | Low |
| Material control | Excellent with good technique | Moderate | Moderate |
Choose a whetstone if learning sharpening technique is important. Choose a preset sharpener if simplicity is the priority.
How to Maintain a Sharp Kitchen Knife
Good knife maintenance reduces how often full sharpening is necessary.
- Use an appropriate cutting board.
- Hone the edge when performance begins to decline.
- Wash and dry the blade according to manufacturer instructions.
- Store knives where the cutting edge is protected.
- Avoid hard cutting surfaces.
- Use the correct knife for each task.
- Sharpen only when honing no longer restores performance.
Knife care also includes proper cutting-board maintenance. Our guide on how to clean a wooden cutting board can help keep the preparation surface in better condition.
When Professional Sharpening Makes More Sense
Professional sharpening is often the safest choice for severely damaged, chipped, specialty, or difficult-to-sharpen knives.
Consider professional service when the blade has large chips, significant deformation, or a complex edge geometry.
Large serrated blades, including many bread knives, can also benefit from professional sharpening. Victorinox recommends professional treatment for larger wavy blades.
Safety Tips for Knife Sharpening
Knife sharpening should always be performed on a stable surface with deliberate movements.
- Keep fingers away from the cutting edge.
- Secure the sharpening stone before use.
- Keep the work area dry where appropriate.
- Follow the sharpener manufacturer’s safety instructions.
- Do not rush the sharpening process.
- Inspect the blade before and after sharpening.
- Clean metal particles from the work surface afterward.
Frequently Asked Questions
What is the best way to sharpen kitchen knives?
A whetstone is generally the most versatile method because it gives you direct control over the sharpening angle and edge refinement.
How do you sharpen a kitchen knife at home?
You can sharpen a kitchen knife at home with a whetstone, manual sharpener, or suitable electric sharpener.
What is the best angle to sharpen a kitchen knife?
Many kitchen knives fall around 15–20 degrees per side, but the manufacturer’s recommended geometry should take priority.
Is a whetstone better than a knife sharpener?
A whetstone offers greater control, while a preset sharpener is easier and faster for many beginners.
Can a honing rod sharpen a knife?
A honing rod primarily realigns an existing edge and cannot fully restore a severely dull blade.
What grit whetstone is best for kitchen knives?
A medium grit around 800–1,200 is practical for many routine sharpening jobs, while coarse and fine grits serve different purposes.
How do you know when a knife is sharp?
A sharp knife should cut common foods cleanly without excessive pressure, and a straight edge can also pass a careful paper test.
How often should you sharpen kitchen knives?
Sharpen when the knife stays dull despite proper honing, because sharpening frequency depends on usage and edge condition.
Can you sharpen serrated kitchen knives?
Yes, but serrated knives require a specialized technique or professional service rather than a conventional flat sharpening method.
Can you sharpen a knife too much?
Yes, unnecessary sharpening removes metal and can gradually thin or alter the blade.
Final Thoughts
Learning how to sharpen knives at home can improve cutting performance and extend the useful life of quality kitchen blades.
Start by identifying the knife’s edge geometry and condition. Then choose a suitable sharpening method, maintain a consistent angle, and use controlled pressure.
A whetstone provides excellent control once the technique becomes familiar. A manual or electric sharpener can make routine maintenance easier for beginners.
Most importantly, do not treat every knife the same. Japanese, Western-style, serrated, and single-bevel knives can require different angles and techniques.
For everyday kitchen equipment, pair good sharpening habits with suitable knives, cutting boards, and storage. That combination helps keep your kitchen tools performing reliably.
- Best Kitchen Knives for Home Cooks
- Best Knife for Home Chef
- Best Cutting Board for Raw Meat
- How to Clean a Wooden Cutting Board
Authority references: For additional manufacturer guidance, consult Victorinox’s knife-sharpening guidance, WÜSTHOF’s sharpening instructions, ZWILLING’s knife-sharpening guide, and Work Sharp’s kitchen-knife angle guide.
Related Articles
Best Kitchen Knives for Home Cooks: 13 Top Picks
September 4, 2026
Best Cutting Boards for Every Kitchen: 12 Top Picks
September 4, 2026